This tutorial is definitely on the advanced rather than basic side of things, but if you are careful, it shouldn’t be a problem.
WARNING ! ! !
There is a small but real risk of data loss or making other programs or Ubuntu unusable.
It is advisable to ensure you have a backup before proceeding.
I don’t expect anything bad to happen (because nothing bad has ever happened to me), but I make no guarantees.
Note: the risk is about the same as applying software updates where old packages are removed and new packages are installed.
Uninstalling a package should be as easy and straightforward as installing it – either enter sudo apt-get remove --auto-remove at a command line or click Remove in the Ubuntu Software Center. Unfortunately, it is not:

The Problem
There are three types of packages: (1) simple, (2) with dependencies, (3) complicated.
Simple packages install only a single program file and that’s it. They are completely self contained and don’t depend on anything other than the core operating system being present. These types of packages are rare.
Packages with dependencies need other files in order to work. When installing one of these packages, Ubuntu Software Center or apt-get determine what additional files are needed and automatically installs them for you. When you uninstall the package, the dependency files are usually left behind. Sometimes they can be removed by using the command sudo apt-get autoremove, but that is an exception rather than the rule.
sudo apt-get autoremove.abiword (a word processor) requires additional files (about 16) to be installed. One of these is ttf-lyx (a font). When you uninstall, abiword it will automatically uninstall some of the files, the remainder can be removed using
sudo apt-get autoremove, but the file ttf-lyx is not – it must be explicitly removed.
Complicated packages (also called metapackages), typically, do not install any files. Instead, they are a collection of dependent packages. These are the hardest to clean up, since you have to uninstall each dependent package (along with its dependencies) separately.
sudo apt-get autoremove will remove nothing else. All the extra files which were installed because lubuntu-desktop said it depended on them remain behind and they use up about about 377 MB of disk space.These include packages like abiword, leafpad (a text editor), lubuntu-core, lxde-common, along with many, many other packages.
Not only are various packages left behind after an uninstall, but also configuration data used by the (now removed) package, directories (folders) and user data – all of these have to be manually removed.
Why Can’t Everything be Uninstalled?
My best guess is because it is a low priority:
- Users want applications to install easily and work. In the (fairly distant) past, installing applications in Linux was a pain – users would install an application and it wouldn’t work, then they would discover they needed to install some other package to get it working, and then there were package incompatibilities (still a problem in Linuxland) and so on. Nowadays, most Linux distributions do a very good job in packaging applications for easy installation.
- Hard disks are big. If you have a 500GB hard disk, will you really notice if 3MB or 50MB or even 1GB of data are cluttering it up? Probably not, the files cached by your Internet browser is likely occupy more space on your hard disk.
- It is not sexy. Who cares if a programmer wrote a really neat uninstaller? Probably no one. Programmers are more interested in “cool” apps. And since it is possible to manually uninstall all the unnecessary applications, there is no incentive to write a proper uninstaller.
- Uninstallation should be a “rare” activity. Although, I think users are very likely to try out applications and uninstall them if they don’t like them or find it is not what they wanted.
- It is hard. If a package is uninstalled shortly after installing it, this is probably no problem uninstalling it because nothing is likely to have changed on the system. But if a package is uninstalled 2 years after having been installed, then there are serious concerns: (1) other applications may have been installed that depend on some of the same files (this makes deciding which files to uninstall complicated), (2) it is likely that updates and upgrades have been applied over time (the files and dependencies may have changed. Consider a program that originally depended on a file called cutting-edge-library, but later the developers switched to using mature-and-stable-library instead – this poses problems to the uninstallation program.
- Finally, if the uninstaller breaks an application the user wants to keep, the user is going to be unhappy, so it is better to be very conservative when uninstalling and leave stuff you are not sure about behind.
All the information needed to uninstall an installed package is available (sometimes it takes a little poking around). The only information not available is which files and folders are created by an application – so cleaning up all the config data, application folders and user data is harder.
This is a long standing problem with Linux – many projects have been started (and abandoned) whose purpose was to clean up leftover files on the computer.
How to Completely Remove a Package
Quick Instructions
1) Open the aptitude log file (/var/log/apt/history.log).
2) Locate the files that were installed.
3) Remove the files using sudo apt-get purge --auto-remove <file names>
4) Locate and remove configuration files and data associated with the package. Most often, they will be found in /home/ and /home/.config/ directories.
Detailed Instructions
Finding Out Which Packages Were Installed
Terminal application.I expect the instructions to be similar for other environments, but no guarantee is made.
Instructions for opening a terminal can be found here.
Opening the Installation History Log File
All installation and uninstallation operations that happen using either apt-get or Ubuntu Software Center (or any of the aptitude family of functions) are stored in /var/log/apt/history.log. Examining the contents of this file allows us to determine which packages were installed.
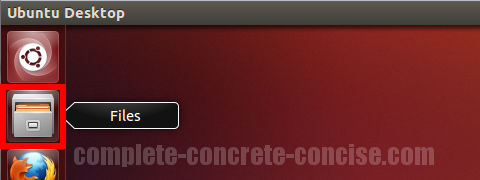
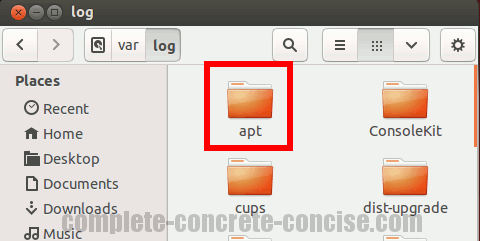
1) Click on the Files icon:
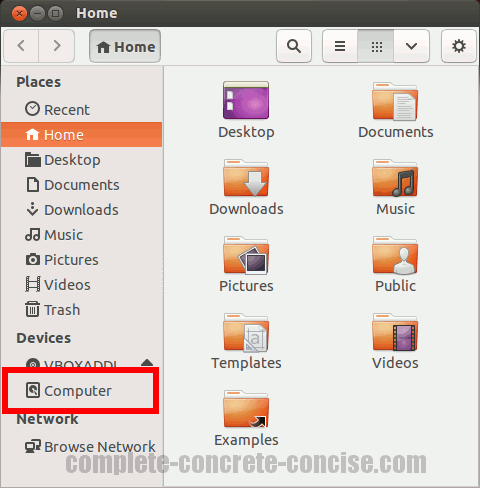
2) Click on Computer:
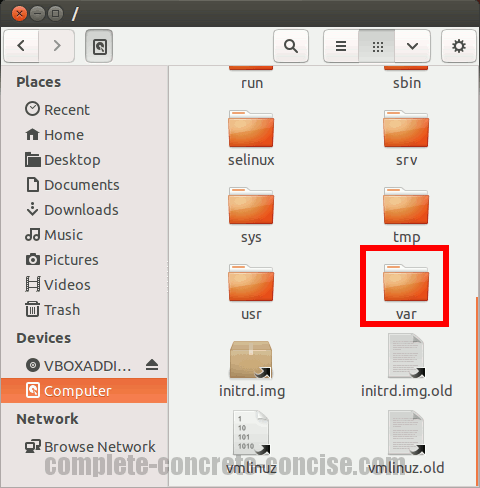
3) Double-click on the var folder:
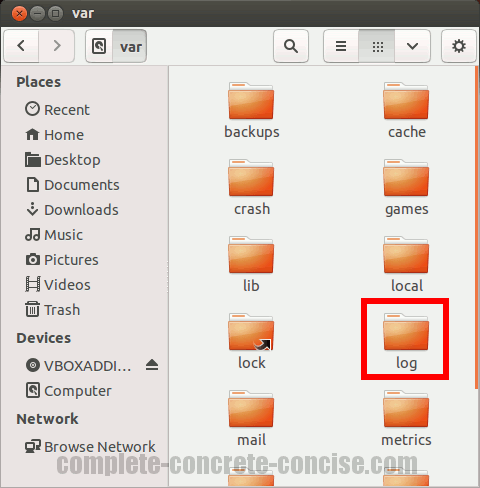
4) Double-click on the log folder:
5) Double-click on the apt folder:
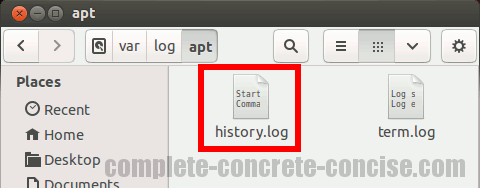
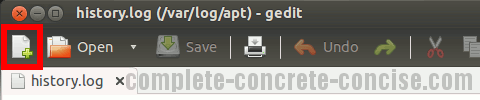
6) Double-click on the history.log file – this should open it with gedit, the default text editor in Ubuntu 13.04:
A Quick Overview of the history.log File
The history.log file contains all the operations performed on your system using apt-get (or any of the aptitude family of programs)
Each block of operations contains:
- a Start-Date and End-Date (red) for the operation
- the operation performed (blue)
- additional information about the operation (green)
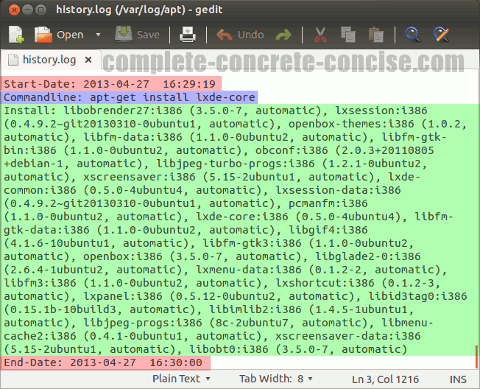
In our case, we are interested in the Install information.
Finding the Installation Data
7) Search for the package you installed. If it was the last package you installed, then it will be at the end of the file. The records are stored with the newest operations towards the end (bottom) of the file and the oldest at the beginning (top) of the file.
history.log file is archived monthly. If you don’t find the required install information in history.log, then check the history.log.<number>.gz files: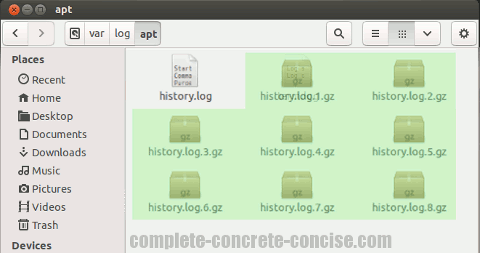
Double clicking the .gz file will open it with Archive Manager. Inside Archive Manager you double click on the file to open it with gedit
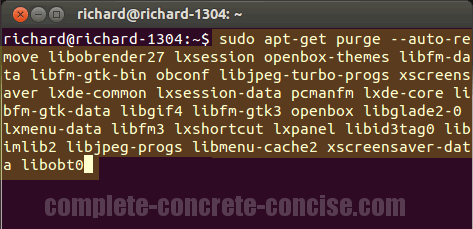
In the sample below, you can see I installed lxde-core on 27-April-2013:
Start-Date: 2013-04-27 16:29:19Commandline: apt-get install lxde-coreInstall: libobrender27:i386 (3.5.0-7, automatic), lxsession:i386 (0.4.9.2~git20130310-0ubuntu1, automatic), openbox-themes:i386 (1.0.2, automatic), libfm-data:i386 (1.1.0-0ubuntu2, automatic), libfm-gtk-bin:i386 (1.1.0-0ubuntu2, automatic), obconf:i386 (2.0.3+20110805+debian-1, automatic), libjpeg-turbo-progs:i386 (1.2.1-0ubuntu2, automatic), xscreensaver:i386 (5.15-2ubuntu1, automatic), lxde-common:i386 (0.5.0-4ubuntu4, automatic), lxsession-data:i386 (0.4.9.2~git20130310-0ubuntu1, automatic), pcmanfm:i386 (1.1.0-0ubuntu2, automatic), lxde-core:i386 (0.5.0-4ubuntu4), libfm-gtk-data:i386 (1.1.0-0ubuntu2, automatic), libgif4:i386 (4.1.6-10ubuntu1, automatic), libfm-gtk3:i386 (1.1.0-0ubuntu2, automatic), openbox:i386 (3.5.0-7, automatic), libglade2-0:i386 (2.6.4-1ubuntu2, automatic), lxmenu-data:i386 (0.1.2-2, automatic), libfm3:i386 (1.1.0-0ubuntu2, automatic), lxshortcut:i386 (0.1.2-3, automatic), lxpanel:i386 (0.5.12-0ubuntu2, automatic), libid3tag0:i386 (0.15.1b-10build3, automatic), libimlib2:i386 (1.4.5-1ubuntu1, automatic), libjpeg-progs:i386 (8c-2ubuntu7, automatic), libmenu-cache2:i386 (0.4.1-0ubuntu1, automatic), xscreensaver-data:i386 (5.15-2ubuntu1, automatic), libobt0:i386 (3.5.0-7, automatic)End-Date: 2013-04-27 16:30:00
8) Cut and paste the Install data into an editor. You can start a new document in gedit by clicking on the Create a new document icon:
9) Edit the data to remove all unnecessary text.
<package name>:i386 (something in parentheses),Only the package name is important. The :i386 (something in parentheses), needs to be deleted.
So
libopenal1:i386 (1.13-2, automatic) becomes libopenal1 after removing the extra information.
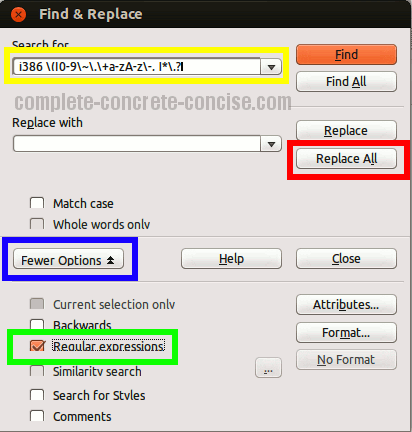
Using LibreOffice Writer 4.0.2.2, you can use one of the following regular expressions (I think they are complete, but they might miss the odd expression):
:i386 \([0-9\~\.\+a-zA-Z\-, ]*\),?:amd64 \([0-9\~\.\+a-zA-Z\-, ]*\),?Press Ctrl + H to launch the Find and Replace dialog in LibreOffice Writer.
- Click on the More Options button (it will change to Fewer Options).
- Click on the Regular expressions box.
- Enter the regular expression into the Search for field.
- Click on the Replace All button.
10) Add the following to the start of the edited package list: sudo apt-get purge --auto-remove . You should have something that looks like this:
sudo apt-get purge --auto-remove libobrender27 lxsession openbox-themes ...
purge option over the remove option because purge claims to remove some of the configuration data.You can always use
sudo apt-get remove --auto-remove instead.
Two very common problems are:
- the ‘s’ in
sudogets changed to UPPERCASE. The Linux command line is case sensitive, soSudois not the same assudo. - the double minus (–) gets converted in a single DASH (–).
Either error will cause the uninstall script to fail.
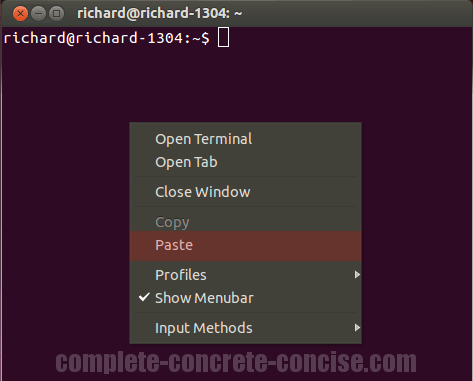
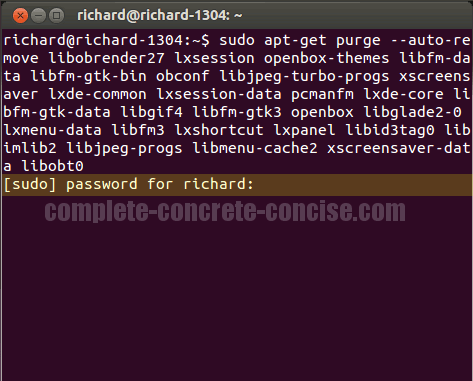
11) Cut and paste this package list with the apt-get command from step 10 into a Terminal to completely uninstall the package.
Ctrl+V will not work.
It should look something like this (the exact list of files will depend on what you are uninstalling):
12) Press the Enter key and enter your password (this is your login password):
sudo apt-get.
13) Press the Enter key after entering your password and apt-get will respond by showing which files are going to be uninstalled:
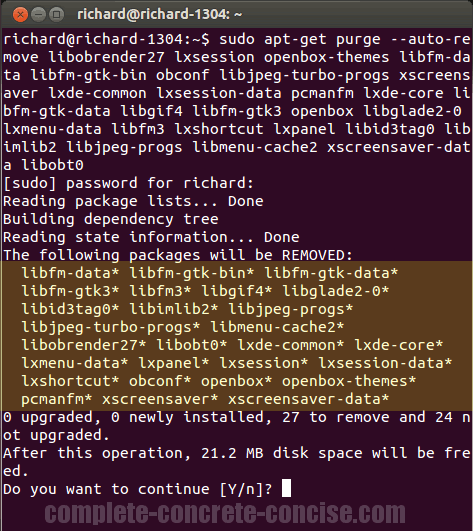
If you want to uninstall the files, then press the Enter key. If you don’t want to uninstall the files, type the N key and then press the Enter key.
WARNING ! ! !
This should work perfectly if the package you are uninstalling is the LAST package you (or anybody else) installed on your system. In other words: No one has installed anything else – not even updates – since this package was installed!
If other packages have been installed, if updates have been installed, then there is a RISK that those packages or updates may have a dependency on one or more of the packages you are uninstalling.
If you uninstall a package that some other package depends on, then that package will no longer function correctly.
Examining all package dependencies is very complicated. Proceed at your own risk – backups are strongly recommended.
Double Checking Your Uninstall Script
If the package you are uninstalling was not the last package installed, there is the risk that you will accidentally uninstall a package that some other application depends on.
Why Double Check?
For example, you install abiword. Abiword depends on the package ttf-lyx and it will be installed it if it is not already installed.
Later, you install cadabra. Cadabra also depends on ttf-lyx, but since it is already installed, it will use the installed copy instead of installing a new copy.
If you uninstall abiword using the technique above, it will explicitly uninstall ttf-lyx (which is also needed by cadabra – which was installed after abiword).
This will cause apt-get to uninstall cadabra because cadabra depends on ttf-lyx.
To avoid this problem, it is necessary to double check that you are not removing any extra files.
Since apt-get displays the files it is going to uninstall, it is a simple matter of checking that no additional files were added to the uninstallation:
Uninstalling Configuration Data
The last thing left to do is to delete / remove all the configuration data.
Unfortunately, this is hard to do since there is no record of what files and folders the (now uninstalled) application put on your computer.
A good place to start is in your /home directory and your /home/.config/ directory.
However, data, files, and folders could be squirreled away all over the place.
As you can see, it is not necessarily obvious what folders and files need deleting:

In this case, I know that it is the three highlighted folders that need deleting, but there is no easy way to tell (except by doing a before and after comparison – even that is tricky because an application typically does not write a .config file until it is used. For example, gedit creates the gedit folder after it is used. If you used gedit after you installed a package and then did a before and after comparison, you might be tempted to think the gedit folder needs to be removed as well.